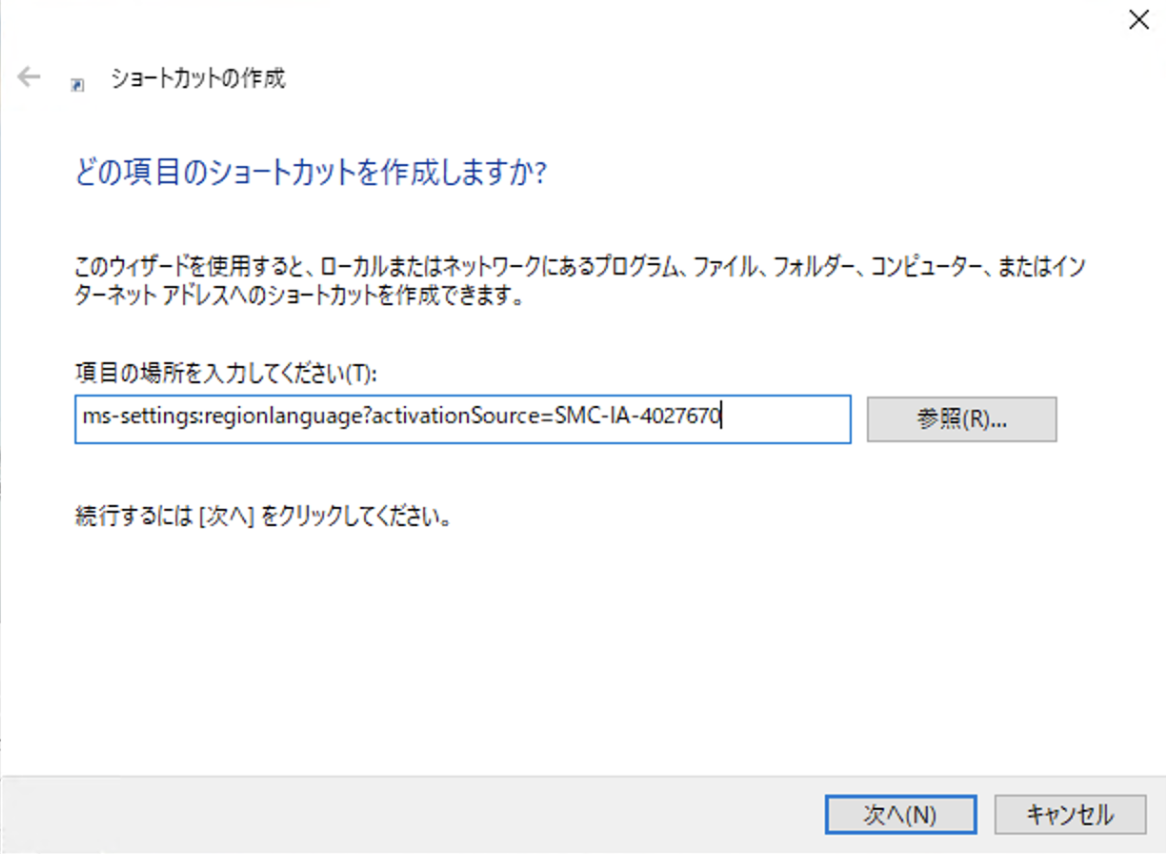
1. はじめに Windowsで多言語対応しているアプリを確認するために、表示言語を切り替えながら作業することがある。 まったくなじみの無い言語だと
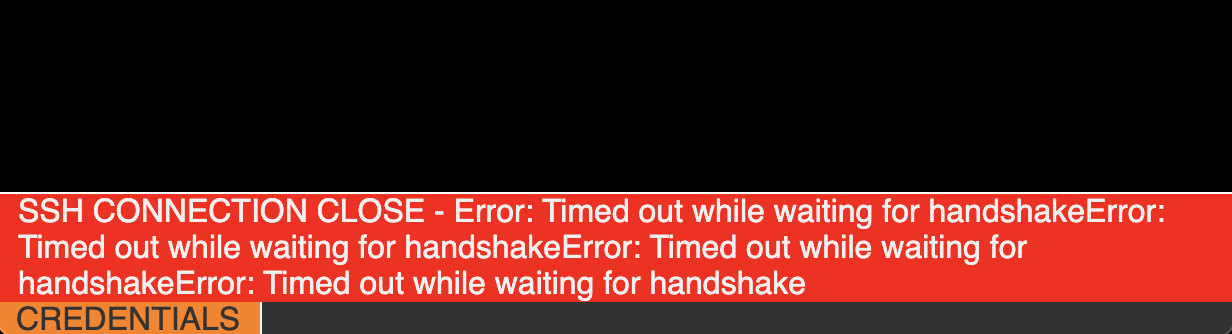
1. はじめに ある日Azureの App Service でssh出来なくなった事があったので、そのときに行ったことを記録しておく。 2. 詳細 ブラウザでSSHセッションを
1. MySQLバージョン SELECT VERSION(); +-----------+ | VERSION() | +-----------+ | 8.0.20 | +-----------+ 2. デフォルトのCollation SHOW COLLATION WHERE COLLATION LIKE 'utf8mb4%' AND `default` = 'Yes'; +--------------------+---------+-----+---------+----------+---------+---------------+ | Collation | Charset | Id | Default | Compiled | Sortlen | Pad_attribute | +--------------------+---------+-----+---------+----------+---------+---------------+ | utf8mb4_0900_ai_ci | utf8mb4 |
1. 環境 インストールする環境はこんな感じ $ sw_vers ProductName: macOS ProductVersion: 11.4 BuildVersion: 20F71 $ phpbrew --version phpbrew - 1.27.0 cliframework core: 2.5.4 $ phpbrew list * php-7.4.21 php-7.4.13 php-7.3.25 $ php -v PHP 7.4.21 (cli) (built: Jul 9 2021 16:54:55) ( NTS ) Copyright (c) The PHP Group Zend Engine v3.4.0, Copyright (c) Zend Technologies with
1. はじめに AzureのAppServiceでPHP7.4にしている場合Redisエクステンションを pecl install redis でインストールすることが出来ない。 以
1. 環境 インストールする環境はこんな感じ $ sw_vers ProductName: macOS ProductVersion: 11.3 BuildVersion: 20E232 $ phpbrew --version phpbrew - 1.27.0 cliframework core: 2.5.4 $ phpbrew list * php-7.4.13 php-7.3.25 $ php -v PHP 7.4.13 (cli) (built: Dec 4 2020 21:48:53) ( NTS ) Copyright (c) The PHP Group Zend Engine v3.4.0, Copyright (c) Zend Technologies 2. イ
1. 環境 インストールする環境はこんな感じ $ sw_vers ProductName: macOS ProductVersion: 11.3 BuildVersion: 20E232 $ phpbrew --version phpbrew - 1.27.0 cliframework core: 2.5.4 $ phpbrew list * php-7.4.13 php-7.3.25 $ php -v PHP 7.4.13 (cli) (built: Dec 4 2020 21:48:53) ( NTS ) Copyright (c) The PHP Group Zend Engine v3.4.0, Copyright (c) Zend Technologies 2. イ
1. 環境 インストールする環境はこんな感じ $ sw_vers ProductName: macOS ProductVersion: 11.3 BuildVersion: 20E232 $ phpbrew --version phpbrew - 1.27.0 cliframework core: 2.5.4 $ phpbrew list * php-7.4.13 php-7.3.25 $ php -v PHP 7.4.13 (cli) (built: Dec 4 2020 21:48:53) ( NTS ) Copyright (c) The PHP Group Zend Engine v3.4.0, Copyright (c) Zend Technologies libiconv は
1. 環境 インストールする環境はこんな感じ $ sw_vers ProductName: macOS ProductVersion: 11.3 BuildVersion: 20E232 $ phpbrew --version phpbrew - 1.27.0 cliframework core: 2.5.4 $ phpbrew list * php-7.4.13 php-7.3.25 $ php -v PHP 7.4.13 (cli) (built: Dec 4 2020 21:48:53) ( NTS ) Copyright (c) The PHP Group Zend Engine v3.4.0, Copyright (c) Zend Technologies 2. イ
1. 環境 インストールする環境はこんな感じ $ sw_vers ProductName: macOS ProductVersion: 11.3 BuildVersion: 20E232 $ phpbrew --version phpbrew - 1.27.0 cliframework core: 2.5.4 $ phpbrew list * php-7.4.13 php-7.3.25 $ php -v PHP 7.4.13 (cli) (built: Dec 4 2020 21:48:53) ( NTS ) Copyright (c) The PHP Group Zend Engine v3.4.0, Copyright (c) Zend Technologies icu4c は